

How to install a Sentek Deep Probe
17 August 2023
Share


Check out this diary of images Sentek provided outlining a project using an EnviroSCAN Deep Probe with Tubing. The pictures demonstrate the step-by-step process involved in installing the sensor and tubing in a slurry hole.
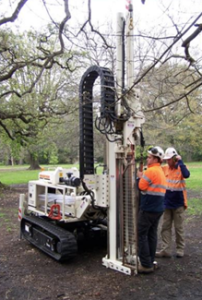
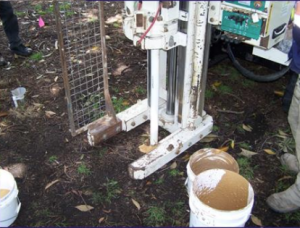
Step 1 – Obtain the right equipment
Due to the depth of the probes for this project a suitable drilling rig is required. Likewise, the right probe and tubing is required with the correct base and cap configuration.
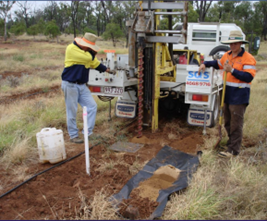
Step 2 – Drilling in action
Use a plastic sheet to collect the different soil horizons. Keeping the soil that is removed is important as this is used for the slurry during the installation process.
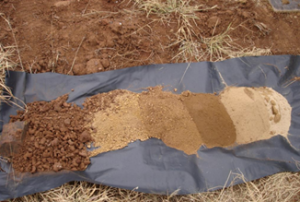
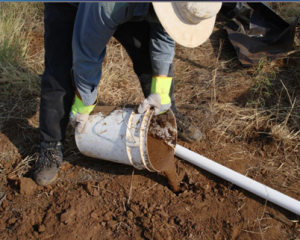
Step 3 – Preparing the slurry
The slurry is prepared using a mix of soil and lots of water (a paint stirrer is a useful tool for mixing!) Make sure to return the soil horizons in the correct order. Some sieving of the soil will be needed to remove the coarser material.
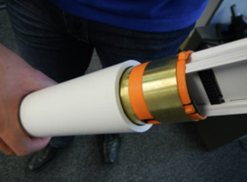
Step 4 – Installing the access tubing
For deep installations, heavy-duty access tubing sections are used. These screw together and can cope with the extra pressures associated with deep installations. Careful use of the drilling rig can assist when pushing the access tube into the slurry.
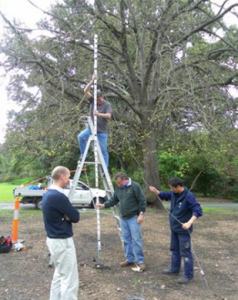
Step 5 – Installing the probe assembly
It is important to support the probe assembly to avoid any warping or bending. This can be done using a raised platform such as a ladder, vehicle or a lifting platform for longer probes.
Note: For deeper installations, probe assembly and testing is likely to happen on-site due to shipping constraints. It is far easier to ship 2m sections rather than a pre-assembled 10m probe!
Images courtesy of Sentek